

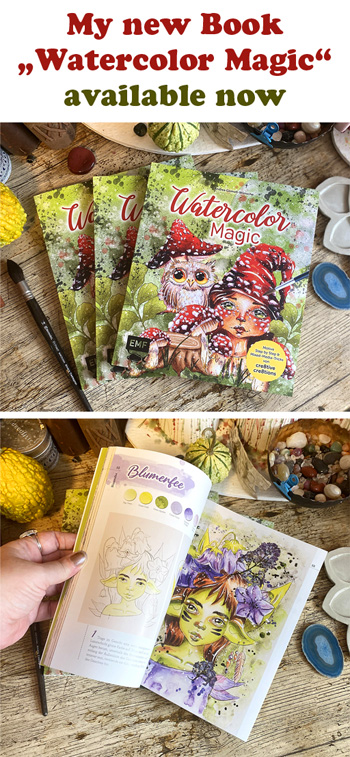
.jpg)
Wednesday = Tutorial Wednesday . . . each & every wednesday you will find
a new Tutorial or some Tipps & Tricks here by our fabulous Designteam . . .
Mittwoch = Tutorial-Mittwoch . . . kuenftig werdet ihr hier immer Mittwochs einen Blogpost
vorfinden, in dem Euch unser tolles Designteam eine kleine Anleitung oder
Tipps & Tricks praesentiert . . .
![]()
Enhanced Flair Button Embellishment
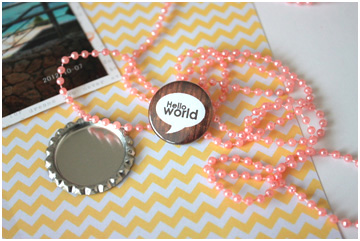
Prepare a Bottle Cap, a pearl chain and a Flair Button.
Man nehme: eine “Bottlecap”, eine Perlenkette und einen Flair-Button.
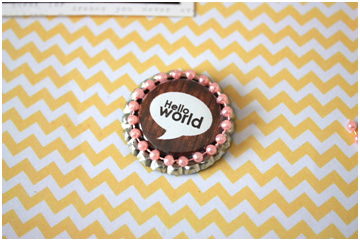
Put the Flair Button on the cap. And stick a pearl around with Glossy Accents.
Setzt den Flair-Button mittig auf den Bottlecap und klebt diesen fest.
Drum herum klebt Ihr die Perlenschnur fest. Am besten funktioniert
transparent trocknender Fluessigkleber wie z.B. Glossy Accents.
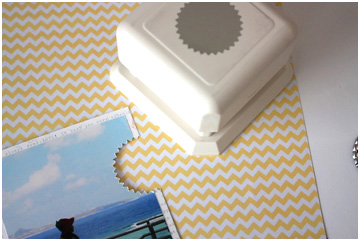
Punch a photo with Circle Punch Tool.
Stanzt am Rand eines Fotos einen Halbkreis mit einem
Kreisstanzer / Musterkreisstanzer.
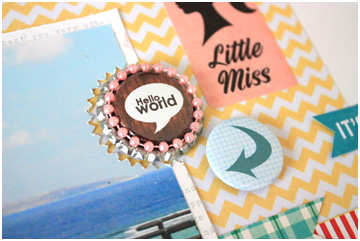
Set the Flair Button in the punched place.
Platziert den aufgepimpten Flair-Button in den ausgestanzten Halbkreis.
Finished-Fertig

Cre8tiveCre8tions Patterned Paper “Bold & Basic”
Cre8tiveCre8tions Flair Buttons “Speechbubbles”
Cre8tiveCre8tions Flair Buttons “Notes”
![]()
||| let us get social |||


Gorgeous layout! Great idea
LOVE this idea!